Image may be NSFW.
Clik here to view.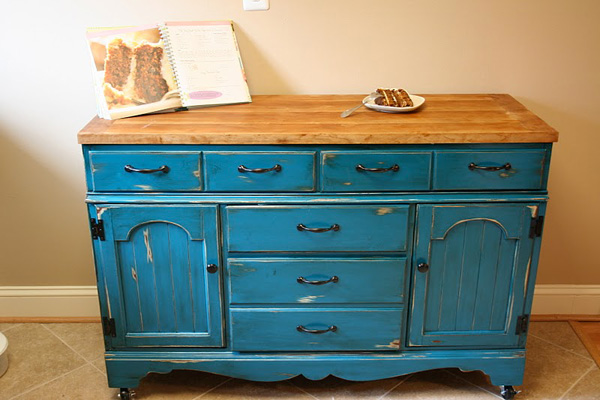
Kitchen island
It seems like some areas of the house can never have too much storage. The kitchen is one such area, and Cassity at Remodelaholic, with the help of Sweet November blogger, has found a way to transform a bulky dresser into a chic addition to the kitchen.Image may be NSFW.
Clik here to view.
You will need:
- Dresser with drawers
- Paint thinner
- Sandpaper
- Paint primer
- Spray paint
- Optional: new hardware, casters
Step 1:
Sand the entire dresser, paying special attention to the top. Be sure to take the drawers out and sand all the edges as well.
Step 2:
Prime the drawers and outside of the dresser .
Step 3:
Paint! They used spray paint because it’s inexpensive and easy to change. Leave the top bare.
Step 4:
Distress drawers and outside of the dresser with sandpaper.
Step 5:
Add stain over the distressed areas so it’s not strikingly different in color.
Step 6 :
Add new hardware and casters to make the kitchen island mobile.
This project was tallied from start to finish and came in at a total of $169.45.
Up next: Dresser facelift >>
{pageBreak}
Image may be NSFW.
Clik here to view.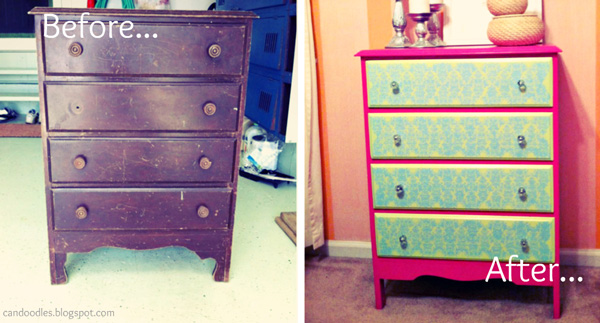
Dresser facelift
If you like your dresser and want to continue to use it as such, perhaps a little facelift is in order. That’s what Candice of Candoodles: ReFab Diaries discovered when her friend shared the potential of a dresser from a grandparents’ shed.
You will need:
- Dresser
- Sandpaper
- Latex paint
- Stencil and stencil brush
- Knobs
Step 1:
Sand entire dresser.
Step 2:
Paint drawers and dresser with latex paint. Allow paint to completely dry before adding stencil on drawers.
Step 3:
For the stencil detailing on drawers, carefully use a stencil pattern and stencil brush .
Note: Remove stencil pattern while paint is wet; latex paint will peel with the stencil if it is dry.
Step 4:
Add knobs.
More crafty advice
DIY framed jewelry holder
Top 10 SheKnows crafts of 2012
How to upcycle a desk