Bake every day a holiday
As a judge on TLC’s hit show Craft Wars, people know that I'm an avid crafter, but what they may not guess is that next to my love of making is my lifetime obsession with baking!
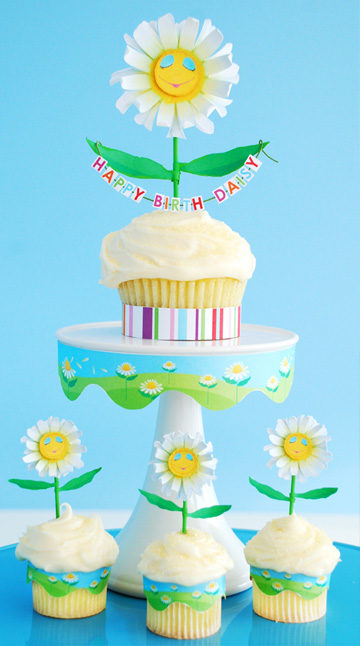
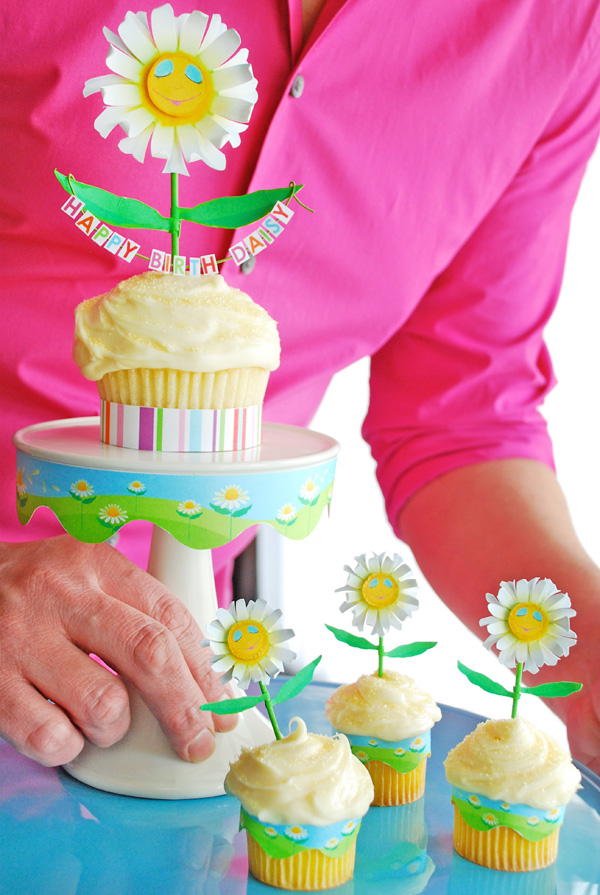
Some of my fondest memories as a child are those that have revolved around projects that I like to call “Bake and Do!” The art of combining a yummy homemade confection with handmade decorations. We call this craft the "birth-daisy," but it can be used for any occasion!
The first thing you will need is something to decorate. So dig out your favorite cupcake recipe or start with a boxed cake mix, which can be as tasty as homemade with a few simple tricks.
The first trick is to sift the cake mix before adding the wet ingredients. This removes the lumps, evenly distributes the baking powder, and gives your finished cake a much better texture.
Next, add one additional egg than is called for on the box to give the cake a richer flavor and add loft when baking. Lastly, pour in two tablespoons of real vanilla to give it that baked-from-scratch taste. Follow all the other ingredients and baking instructions on the box. Let the cupcake cool and frost it with a basic buttercream.
For my project, I baked cupcakes in two different sizes: a large cupcake to use as my centerpiece and small bite-sized ones to make rows of posies around my party table.
The baking is done. Now let's get crafting!
What you'll need:
- White cardstock
- Printer
- Scissors
- White glue
- Glue dots
- Toothpicks
- Kitchen skewers
- Green acrylic paint
- Wire
- Glitter
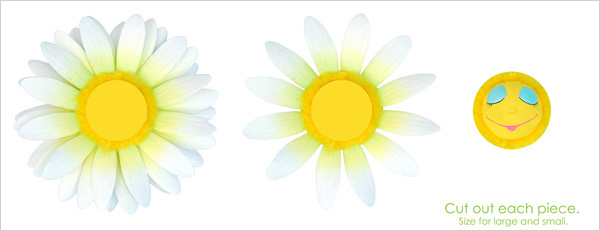
Step 1: Download and print clipart
Download and print my birth-daisy clipart on white cardstock and cut out the pieces using a small pair of scissors or craft knife.
Step 2: Create the flower parts
Daisy heads: Using glue dots, stack the three layers of clipart one on top of the other. This will give the faces lots of dimension... like a pop-up book!
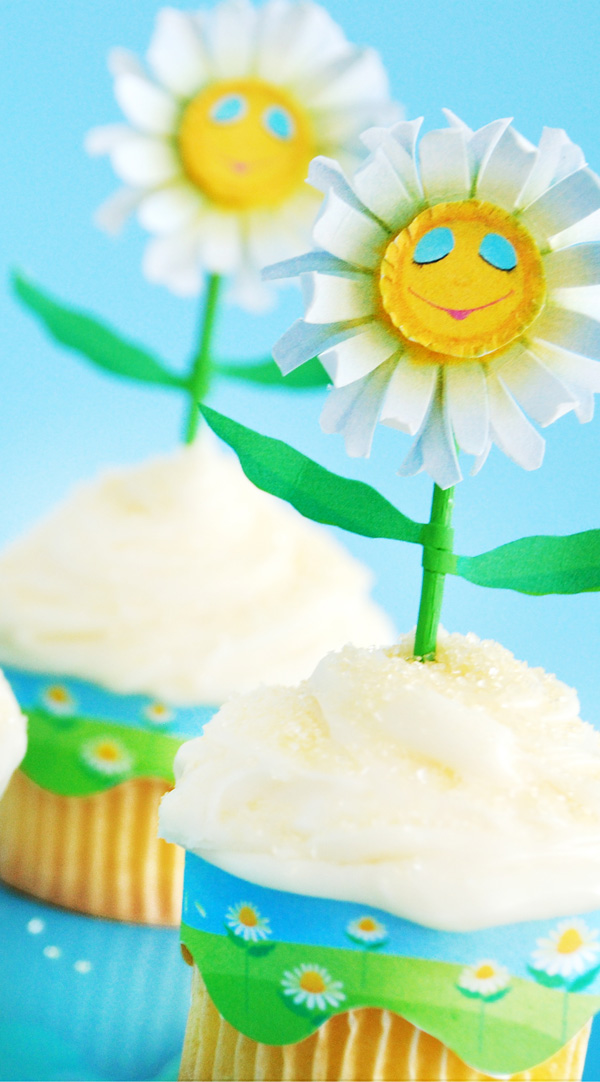
Stems: Apply a coat of green acrylic paint to kitchen skewers or toothpicks to create the stems.
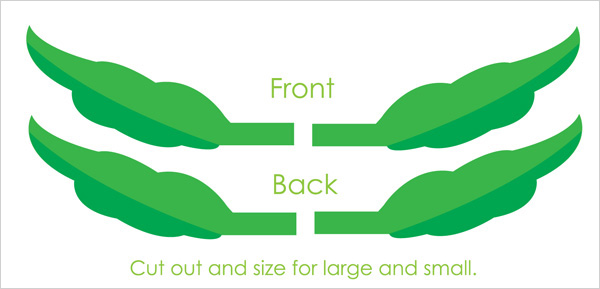
Leaves: Use white glue to attach the fronts and backs of the clipart together, then attach them to your pick. I like them placed a little high, so they look like the daisies arms.
Step 3: Assemble the flower
Attach the head of your daisy to the top of the pick using white glue.
Step 4: Add a message
If you want to add a message to your centerpiece, like “Happy Birth-daisy,” cut out the clipart letters, glue them to a thin wire, and fold the ends onto the leaves like the daisy is holding a banner of salutations!

Step 5: Cover with glitter
Brush on some white glue and cover your daisies in glitter if desired. While I do not recommend this , eating glitter has not killed me yet! So you decide .
Step 6: Add a border
To complete your party look, print out the clipart for my decorative daisy border and attach it to the edges of your favorite cake plate with double-sided tape.

Final craft
More craft ideas
DIY plastic spoon wreath
Easy DIY painted frame
DIY vintage tub garden